
Point of sale card
A shop, a warehouse or a pickup point: where orders are shipped from and where the shopper comes.
How to open it
- New point: the "New point of sale" button in the list of points or in the Store settings.
- Editing: click the point name in the list.
What you can do
- Fill in the point's details: name, address, opening hours, phone
- Put the point on the map
- Upload a photo
- Mark the point active, default or system
The interface
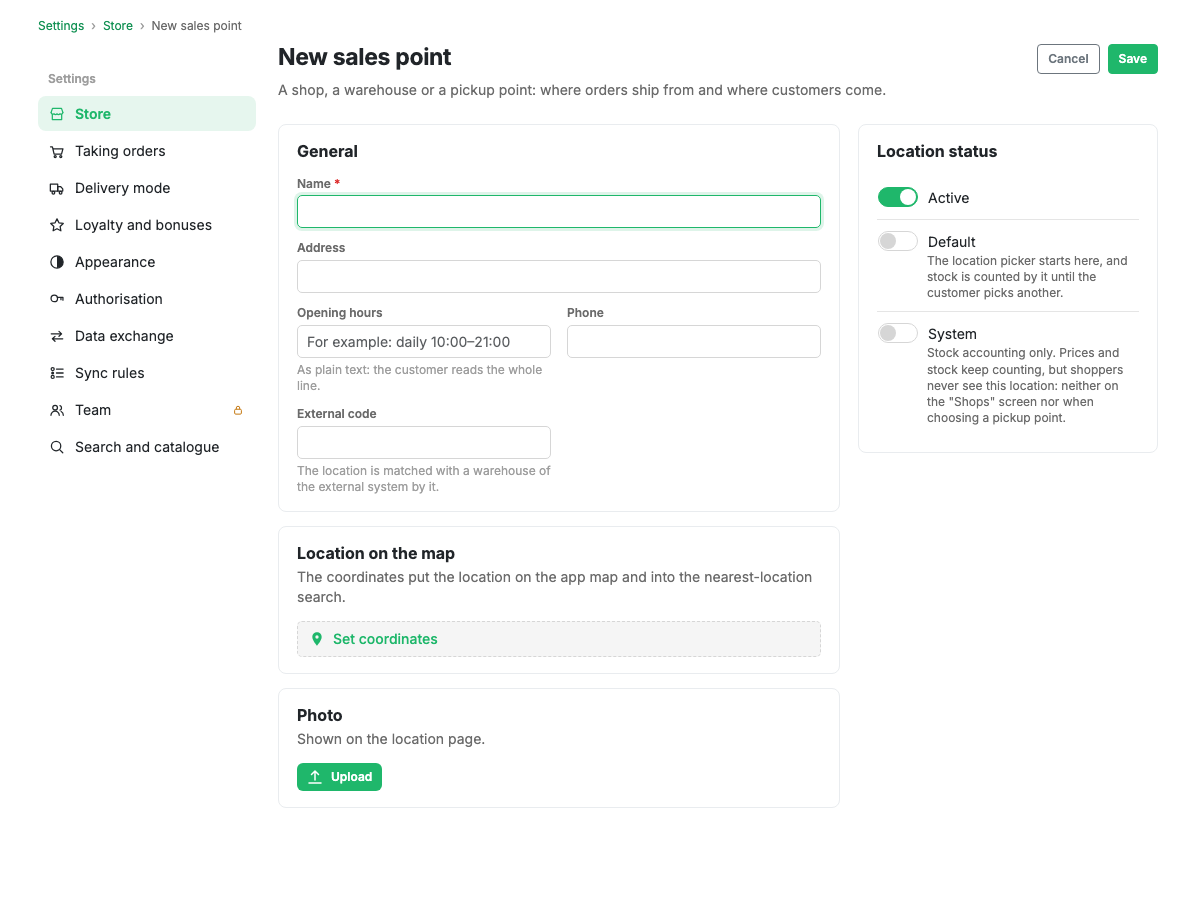
General
- Name: required.
- Address of the point.
- Opening hours: free text. The shopper reads it as written, so write it the way you want it shown: "Daily 10:00-21:00".
- Phone.
- External code: the point is matched to an external system's warehouse by it.
Point on the map
Coordinates put the point on the map in the app and make it eligible for "nearest point" selection. The "Set coordinates" button opens the map picker.
Photo
Shown on the point of sale card in the app.
How the point works
- Active: show the point in the app.
- Default: point selection starts from it and stock is counted against it until the shopper picks another.
- System: a warehouse for accounting. Stock and prices are counted, but the shopper never sees the point, neither on the Stores screen nor when choosing pickup.
Scenarios
Add a pickup point
- Press "New point of sale".
- Fill in the name, address, opening hours and phone.
- Set the coordinates so the point lands on the map.
- Leave System switched off: the shopper needs to see it.
- Save.
Add a warehouse for accounting
Fill in the name and switch System on. Such a warehouse takes part in stock but is not shown to shoppers.
Limits and caveats
- Without coordinates a point will not appear on the map or in nearest-point selection.
- Prices and stock belong to a point: adding a second one gives you a separate price and stock figure for each.
Related pages
Updated 04.09.2026 18:04
Was this page helpful?